For New Users
Turn on wifi in your laptop and connect to SCSVMV-WiFi-REGISTRATION SSID. Passsword is wifi123* Open the Browser and type http://172.16.16.16 Click the PROFNET/STUNET REGISTER Fill in the form
For existing users
The username and password is the registration number for students and staffid/Evarsityid for faculty/staff in caps off. [For ex. use 11129a001. Dont use 11129A001]
Windows 8.1 and beyond
Enter your username and password in the prompt which appears when connecting to the ProfNET or StuNET.
Mac
Enter your username and password in the prompt which appears when connecting to the ProfNET or StuNET.
Windows Xp/Vista/7
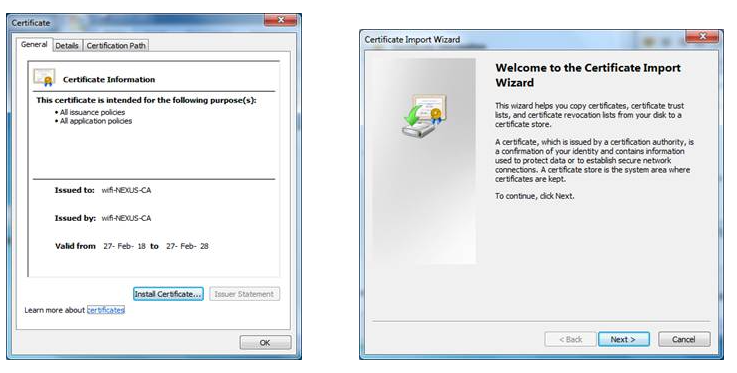
1) Download the ceritificate file NEXUS.wifi.scsvmvuniv.net_wifi-NEXUS-CA. here.
2) Install the ceritificate
3) Click NEXT
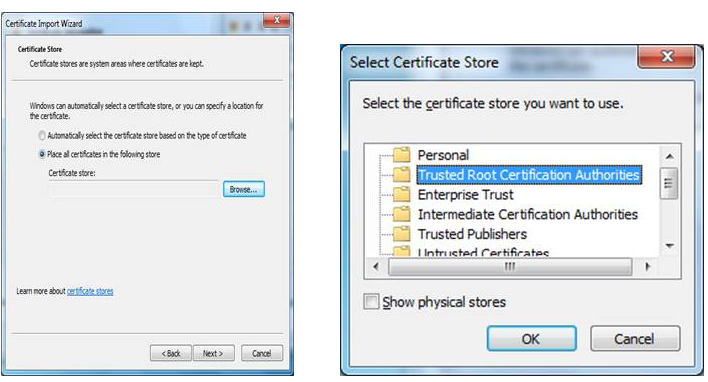
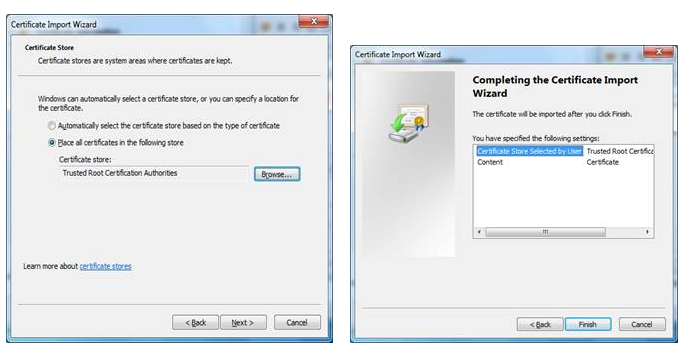
4) Click Browse and Select Trusted Root Certification Authorities
5) Click OK
6) Click Next and Finish
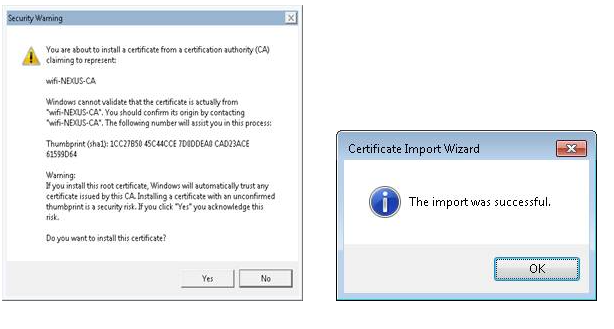
7) Click YES and OK
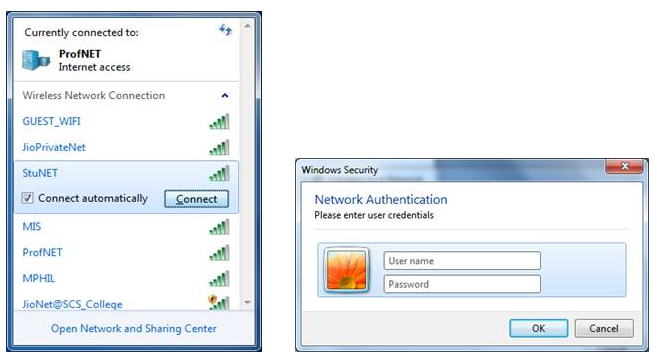
8) Select SSID StuNET/ProfNET Give the Username & Password (Small Case Only Eg:11129a001)
9) Click Connect
Ubuntu
1) Download the ceritificate file
2) Connect to the ProfNET/StuNET SSID. In the dialog box which appears, set the following values for the various fields –
Wireless secuity – WPA & WPA2 Enterprise
Authentication – Protected EAP (PEAP)
Anonymous identity – [Enter your username]
CA certificate – [Upload the certificate file downloaded in the previous step]
PEAP version – Automatic
Inner Authentication – MSCHAPv2
Username – [Enter your username]
Password – [Enter your password] Click “Connect”
For Faster Browsing and better system response, perform the following regularly
Step 1:
Check whether you have installed a valid antivirus in your system which is uptodate, Don’t use free antivirus, total security and internet security in your system. A valid Antivirus will do!!
Step 2:
Your data partition should be separate from your operating system partition in the laptop and there should be enough free space. Don’t keep all your downloaded and important files in C:\. Copy those files into another partitions. Also remove the unused and expired softwares in your system and uninstall them.
Step 3:
Clean your Browser history on a regular basis after your browsing job is over.
Hint:
In the web browser –> go to options and select privacy and clear the history daily.
Step 4:
Clean the temp files once in three days or a week.
Hint:
Go to start menu in command prompt (or) press windows key +R in your keyboard
Type %temp%
And select all files and press shift +delete.
Step 5:
To delete recent file in your system
Hint:
Go to start menu in command prompt (or) press windows key +R in your keyboard
Type recent
Then select all files and press Shift+delete
1.Download the Certificate From the Intranet Server (http://192.168.10.251/WIFI) /Below
2.Install the certificate NEXUS.wifi.scsvmvuniv.net_wifi-NEXUS-CA
3,Click NEXT
4.Click Browse and Select Trusted Root Certification Authorities
5.Click OK
6.Click Next and Finish
7.Click YES and OK
8.Select SSID (StuNET) Give the Username & Password (Small Case Only Eg:11159a000)
9.Username and Password Same Register number only.
10.Click Connect
11.Stunet Internet Timing MONDAY TO FRIDAY 16:45 to 08:45 and SATURDAY and SUNDAY 00:00 to 24:00
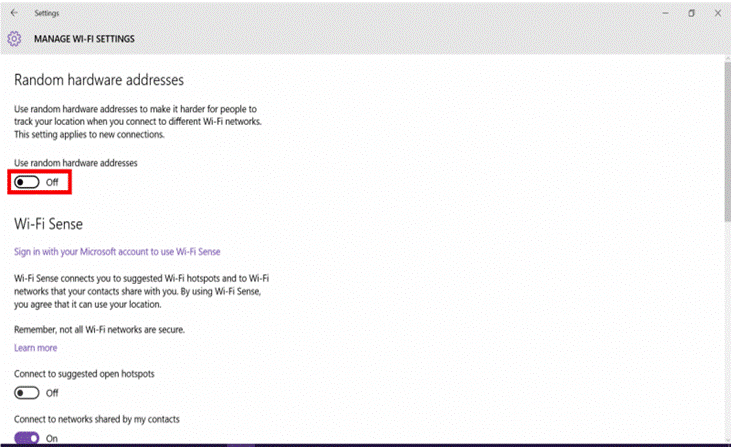
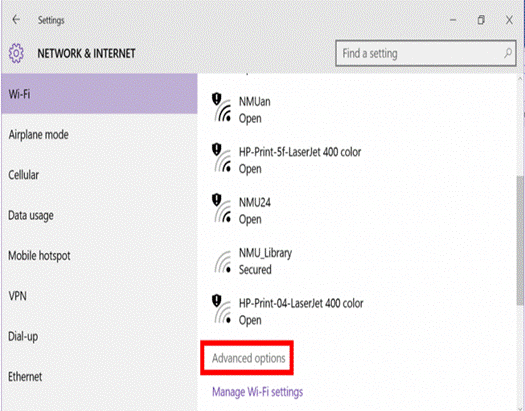
1. Click on the Network Settings icon and select “Network Settings.”
2. In the “WiFi” tab, select “Advanced Options.”
3. Select “Off” under “Random Hardware Address.”